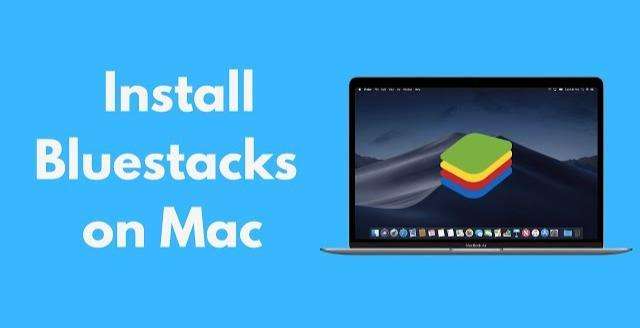
If you love playing Android games, but you don’t have an Android device, or you want to enjoy a bigger screen and better performance, then you might be wondering how to use BlueStacks on Mac.
BlueStacks is a popular Android emulator that allows you to run Android apps and games on your Mac.
With BlueStacks, you can access thousands of games from the Google Play Store or Appstore, and play them with the convenience of your keyboard, mouse, and gamepad.

But how do you install and use BlueStacks on Mac? Is it compatible with your Mac model and macOS version? What are the benefits and drawbacks of using BlueStacks on Mac? And how can you optimize your gaming experience with BlueStacks?
In this ultimate guide, we will answer all these questions and more. We will show you how to download and install BlueStacks on Mac, how to set it up and customize it, how to troubleshoot common issues, and how to get the most out of BlueStacks on Mac.
By the end of this article, you will be able to use BlueStacks on Mac like a pro, and enjoy your favourite Android games on your MacBook.
Let’s get started!
How to Download and Install BlueStacks on Mac
The first step to use BlueStacks on Mac is to download and install it on your Mac. Here are the steps to do that:
Step 1. Visit the our official BlueStacks download section and click on the “Download BlueStacks 4” button.
This will download the BlueStacks installer for Mac.
Step 2. Once the download is complete, go to your “Downloads” folder and double-click on the BlueStacks installer file.
This will open the BlueStacks installer window.

Step 3. In the BlueStacks installer window, double-click on the BlueStacks icon to start the installation process.
Step 4. You will be asked to confirm whether you want to open the BlueStacks installer. Click on “Open” to proceed.
Step 5. Next, you will see a new BlueStacks window. Here, click on “Install Now” to begin the installation.

Step 6. You will be asked to enter your username and password to confirm the installation. Enter your credentials and click on “Install Helper”.
Step 7. After entering your information, you may see a “System Extension Blocked” popup. This is because BlueStacks requires some system permissions to run properly. To grant these permissions, click on “Open Security & Privacy”.
Step 8. This will open the Security & Privacy settings on your Mac. Here, click on the “Allow” button in the General tab.
This will allow BlueStacks to install the necessary system extensions.

Step 9. If you are using macOS 11 Big Sur, you will need to restart your Mac to complete the installation. If you are using macOS 10.15 Catalina or below, you can skip this step.
Step 10. Finally, launch BlueStacks from your Applications folder or Launchpad. You have successfully installed BlueStacks on Mac!

How to Set Up and Customize BlueStacks on Mac
Now that you have installed BlueStacks on Mac, you need to set it up and customize it according to your preferences.
Here are the steps to do that:
1. When you launch BlueStacks for the first time, you will see a welcome screen. Here, you can choose your preferred language and sign in with your Google account.
Signing in with your Google account is necessary to access the Google Play Store and install games on BlueStacks.
If you don’t have a Google account, you can create one for free.
2. After signing in with your Google account, you will see the BlueStacks home screen. Here, you can see the pre-installed apps and games, as well as the icons for the App Centre, My Games, and Help Centre.
You can also access the side toolbar, which contains various features and settings for BlueStacks.
3. To install a game on BlueStacks, you can either use the App Centre, which showcases the most popular and recommended games for BlueStacks, or use the Google Play Store, which gives you access to the entire Android app library.
To use the Google Play Store, click on its icon on the home screen, and search for the game you want to install. Then, click on the “Install” button and wait for the game to download and install on BlueStacks.

4. To launch a game on BlueStacks, you can either click on its icon on the home screen, or go to the My Games tab, which shows all the games you have installed on BlueStacks.
You can also create shortcuts for your favourite games on your Mac desktop, by right-clicking on the game icon and choosing “Create Desktop Shortcut”.
5. To customize BlueStacks on Mac, you can use the settings menu, which can be accessed by clicking on the gear icon on the side toolbar.
Here, you can adjust various options for BlueStacks, such as the display resolution, the graphics mode, the keyboard and mouse controls, the gamepad settings, the notifications, the preferences, and more.
You can also check for updates, change your account, and contact support from the settings menu.
How to Troubleshoot Common Issues with BlueStacks on Mac
While BlueStacks is designed to run smoothly on Mac, you may encounter some issues or errors while using it.
Here are some of the common issues with BlueStacks on Mac, and how to fix them:
BlueStacks is slow or laggy:
This may be due to insufficient RAM or CPU resources on your Mac, or due to an outdated graphics driver. To fix this, you can try the following solutions:
- Increase the RAM and CPU allocation for BlueStacks from the settings menu. You can also enable the High Performance mode for better graphics quality and performance.
- Update your graphics driver to the latest version. You can do this by visiting the official website of your graphics card manufacturer, and downloading and installing the latest driver for your Mac model and macOS version.
- Clear the cache and data of BlueStacks from the settings menu. This will free up some space and improve the performance of BlueStacks.
- Restart BlueStacks or your Mac. This will refresh the system and resolve any temporary glitches or conflicts.
BlueStacks crashes or freezes:
This may be due to a corrupted or incompatible game or app, or due to a software conflict.
To fix this, you can try the following solutions:
- Uninstall and reinstall the game or app that is causing the problem. You can do this by long-pressing on the game or app icon on the home screen, and choosing “Uninstall”. Then, you can reinstall it from the Google Play Store or the App Centre.
- Disable any antivirus or firewall software that may be interfering with BlueStacks. You can do this by going to the System Preferences on your Mac, and turning off the security features that may be blocking BlueStacks.
- Repair the disk permissions on your Mac. This will fix any errors or inconsistencies in the file system that may be affecting BlueStacks. You can do this by using the Disk Utility app on your Mac, and choosing the “First Aid” option for your Macintosh HD.
- Reinstall BlueStacks on your Mac. This will remove any corrupted or outdated files and settings that may be causing the problem. You can do this by dragging the BlueStacks app to the Trash, and then downloading and installing it again from the official website.
BlueStacks does not open or launch:
This may be due to a missing or damaged system extension, or due to a permission issue.
To fix this, you can try the following solutions:
- Check and allow the system extension for BlueStacks from the Security & Privacy settings on your Mac. You can do this by going to the System Preferences on your Mac, and clicking on the “Security & Privacy” icon. Then, go to the General tab, and click on the “Allow” button for the BlueStacks system extension.
- Run BlueStacks as an administrator on your Mac. This will grant BlueStacks the necessary permissions to run properly. You can do this by right-clicking on the BlueStacks app, and choosing “Open as Administrator”.
- Update your macOS to the latest version. This will ensure that your Mac is compatible with BlueStacks and has the latest security patches and bug fixes. You can do this by going to the System Preferences on your Mac, and clicking on the “Software Update” icon. Then, click on the “Update Now” button and follow the instructions.
How to Get the Most Out of BlueStacks on Mac
Now that you know how to use BlueStacks on Mac, you may be wondering how to get the most out of it.
Here are some tips and tricks to enhance your gaming experience with BlueStacks on Mac:
Use the keyboard and mouse controls to play games more comfortably and efficiently.
You can customize the keyboard and mouse controls for each game from the settings menu, or use the default ones provided by BlueStacks. You can also use the Game Guide feature to see the keyboard and mouse controls for each game on the screen.
Use the gamepad to play games more immersively and realistically.
You can connect your gamepad to your Mac via Bluetooth or USB, and use it to.
RELATED ARTICLES
- How to Download BlueStacks App Player for Free and Enjoy Android Apps on Your PC
- How to Download and Use BlueStacks on Mac: The Ultimate Guide to Enjoy Android Games on Your MacBook
- How to Run Any Android App on Your PC with These Top 10 Best Android Emulators for Pc Windows/MAC in 2024
- The Ultimate Guide to Android Emulators: What They Are, Why You Need Them, and Which Ones to Choose
- InShot Pro Mod Apk iOS Free Download – 100% Free & Premium features Unlocked
- How to Download and Install InShot Pro Apk For Pc in 5 Easy Steps
- How to Get Inshot Pro Mod Apk Latest Version Free Download and Unlock All Features
RELATED APPLICATIONS


SEE MORE APPLICATIONS


